


Introduction
I recently ran into an integration where the requirements led me to developing a design where an invocation channel was the best route to synchronously accessing an external financial Mitchell Humphrey web service. The requirements included:
- Synchronous
- Generated by approvals in PO and INVOICE applications
- Errors generated by the MH system would have enough detail returned to the user to enable them to possibly take corrective action immediately instead of relying on log files and possibly other support people.
- No Java
I would start with PO activity in Maximo and send data to the MH system. If an error occurred, I would need to review the details in order to present a message to the users they could use to figure out the problem.
My basic design meant I would take PO data, convert it to an entirely different XML structure and send it to MH. I had to indicate on the invocation channel that I was interested in return data so I could analyze failures. This directed me to use XSLT files to transform outbound and inbound data. In Maximo there is a place to specify XSLT files for outbound requests and inbound responses. The complexity of the processing needed encouraged me to use a debugger for my XSLT.
There are a lot of tools to use for XSLT, but some of them are deluxe (and expensive). Because of a variety of reasons, after my trial of XML Spy expired, I chose IntelliJ community edition. The rest of this article talks about the details.
Note: I started off with the community edition 2018. When I started working on another computer I used the 2020 community edition, but an apparent issue with evaluating expressions in the 2020 version let me back to the 2018 version which luckily I never uninstalled on my other computer.
Summary
It is easy to get going with this sort of activity – basically:
- Create a java project
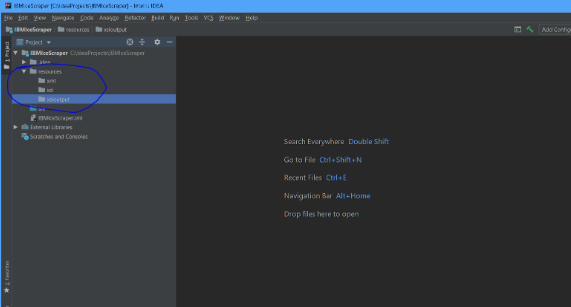
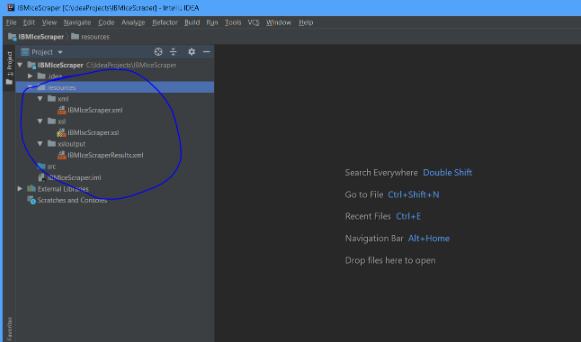
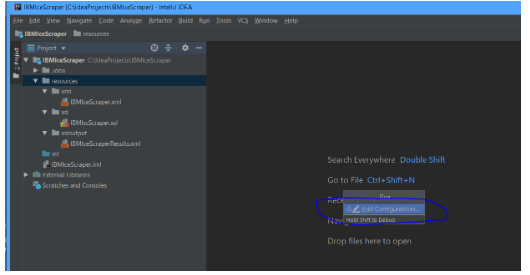
- Create a set of folders to put your xml, xsl and other files in
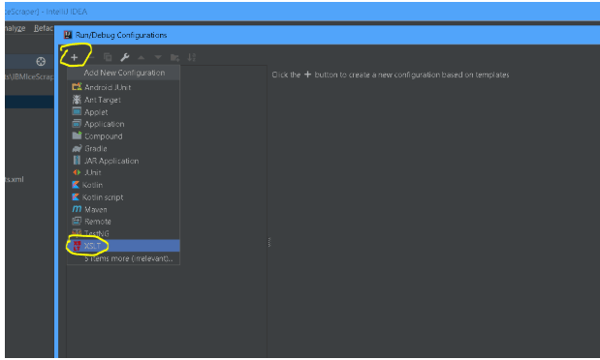
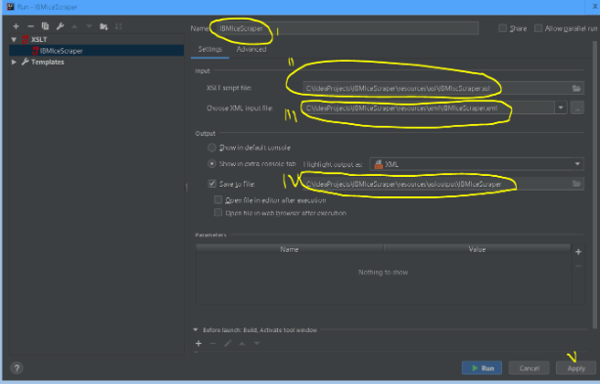
- Create a run configuration
- Run or Debug the XSL
Details
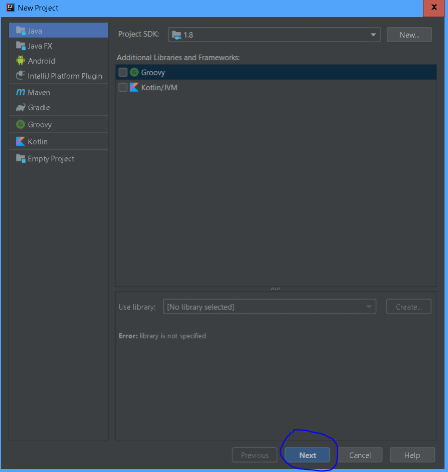
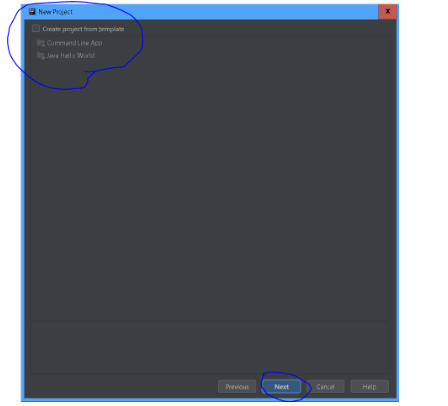
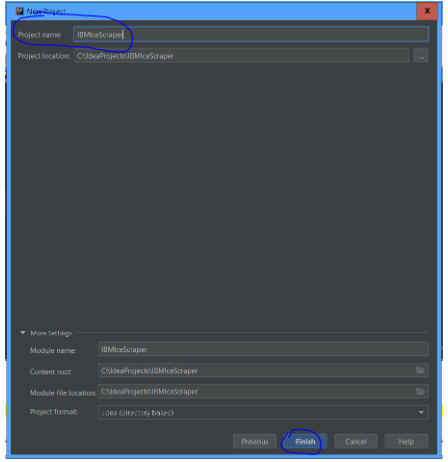
Create a java project
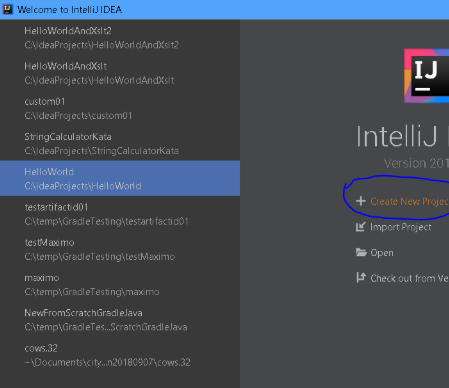
No libraries just go right on into it
Give it a name
Create a set of folders and add an input xml file, xsl transformation file and an output file (optional)
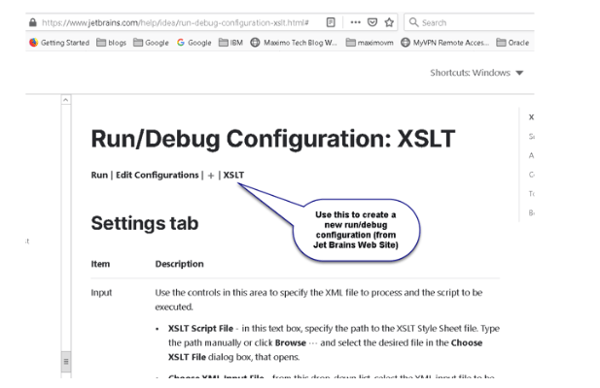
Create a run configuration
Jet Brains Web Site Instructions
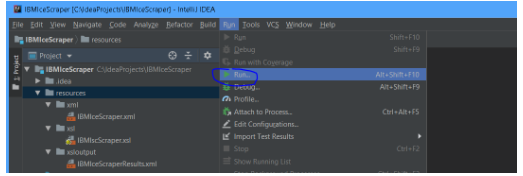
Run or Debug
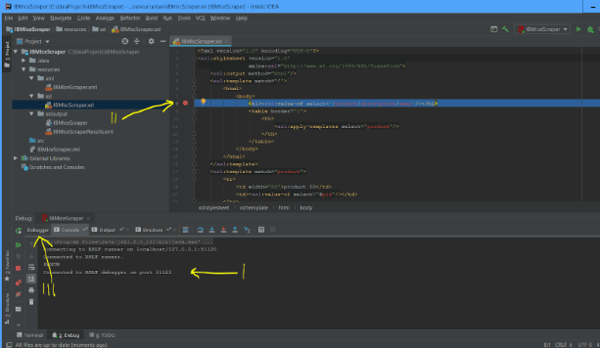
Set a break point in the xsl file – just double click on the file to bring it up and then click in the left margin.
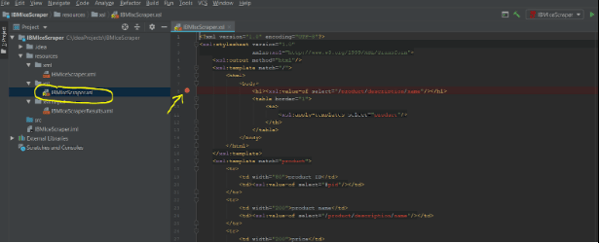
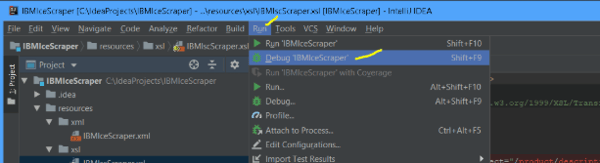
Now use the Run Menu to choose debug
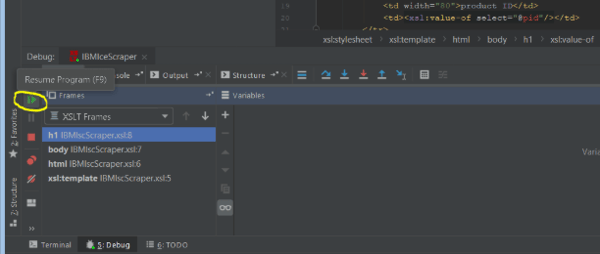
It will run immediately to your first break point – step III below means bring up the debugger view after you see this screen below
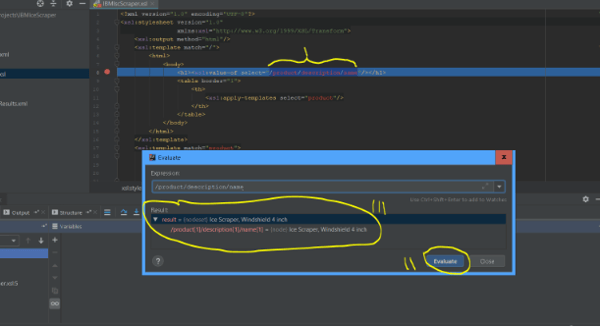
After bringing up the debugger window you can see a section at the bottom where it would show you any variables (none in this sample). Above that I have selected an expression and then right clicked to bring up the 'evaluate' window

You can see that I have selected /product/description/name – an xpath expression the evaluate dialog allows me to see its value. Remember everything is in 'context' so if you were iterating through via a template you could also use a relative xpath expression
This toolbar lets you do other 'normal' debugger activities such as step into
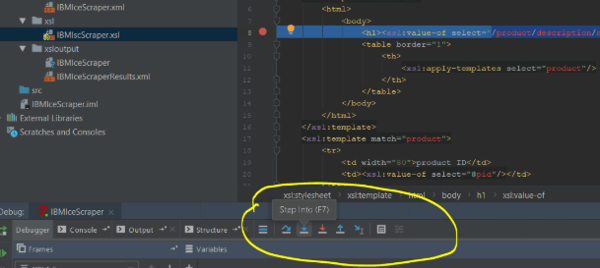
Also on the left are other controls, such as Resume Program which runs to either the next break point or to the end
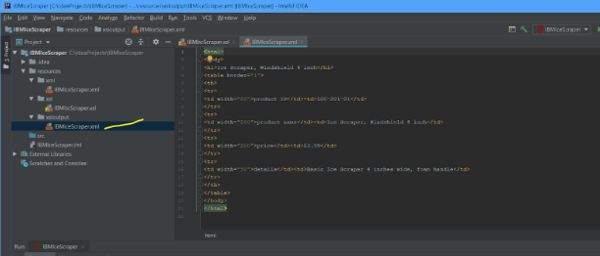
Every time you re-run it it will overwrite the output file. Here I ran it again to regenerate the output file after I fixed the run configuration to output to a file with an 'xml' extension.
Nothing like an easy to use free tool to make your day a little less hectic.