


A few years ago, Maximo introduced Inspection Forms as part of the Work Center capabilities. Inspection forms are quite powerful when utilized appropriately and can simplify and streamline your inspection process. With this capability, Inspections can now be Preventative Maintenance (PM) driven, with the Inspection and results able to be stored within a work order.

While the addition of the Inspection Form alone improves Inspection procedures, there are a few tips & techniques that make the Inspection Form easier to complete and more efficiently capture results found in the field.
Tip #1 – Plan your Inspection Before you Start to Create It
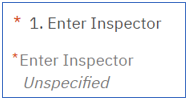
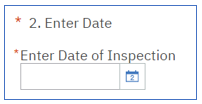
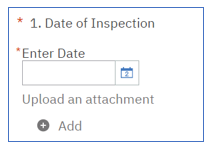
An Inspection Form is a series of questions that you want an inspector or technician to answer. As you write the question, choose the response, designate whether it's mandatory, and even add instructional text if desired. The responses might be a single choice from a set of possible answers, a single numeric value, a date and/or time, a meter reading, a text response, or the ability to add an attachment, photo, or video.
Use the design of asking a series of questions for the inspector to answer and Plan on the possible results the inspector may find. For example:
• What needs to be inspected?
• How often is the Inspection performed?
• What questions need to be asked?
• Does it make logical sense to group the questions into a particular order?
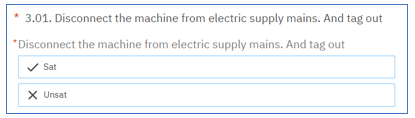
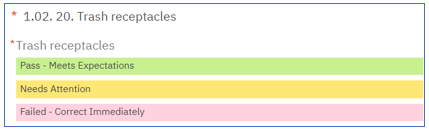
• Is the condition satisfactory (Sat) or unsatisfactory (Unsat)?
• If Unsat, what additional questions would you ask?
• Does he/she need to capture a photo or video of the Unsat condition?
• What actions would need to be taken for an Unsat condition?
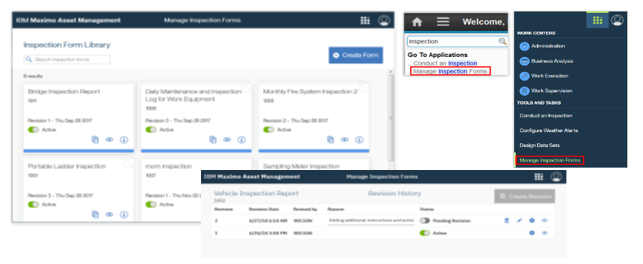
The Manage Inspection Forms tool opens and brings you to a dashboard showing each inspection form in the library as a card. You can create a new Inspection Form or copy an existing form. The initial Inspection Form is at draft status and revision 1 Inspection Forms are under revision control.
Adding Questions
Text response (Red Asterix indicates required entry)
Date entry utilizes the calendar feature
Single choice from a select list of Values (icons can be added to the selectable responses)
Add Colors or Icons
Add Attachments
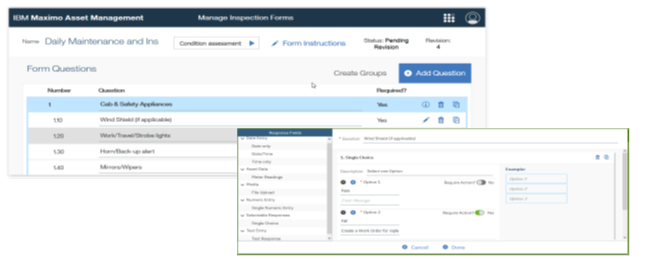
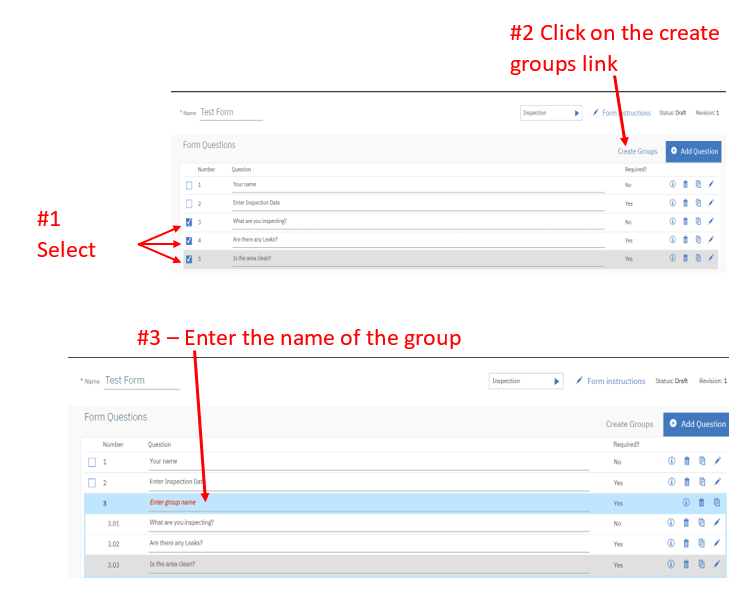
Tip #2 – Enter all Questions Before you Start Grouping Them
Creating Groups
Questions can be grouped, and you can add conditions from one question to another group of questions depending on the answer provided. You can also preview how the inspection form will display when the technician or inspector is conducting the Inspection.
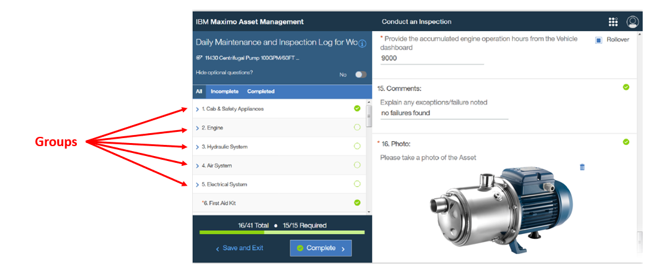
Once all the questions are entered, you can start at the top of the list and select the questions by clicking on the box for each question, then click on create group to insert the grouping.
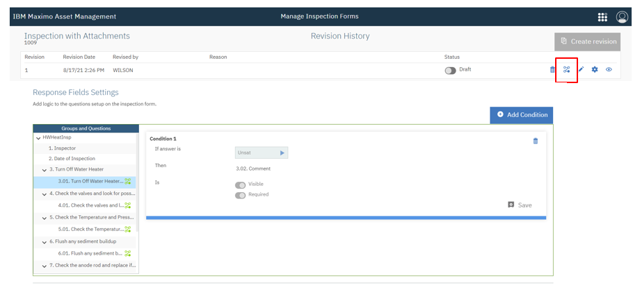
Tip #3 – Make Sure All of the Questions Exist on the Form to Add Conditions to the Response
Add conditions to your Inspection Form to simplify the form for normal conditions. In this example, we standardized the Unsat response for all questions, and if Unsat is recorded, entering comments becomes visible and required.
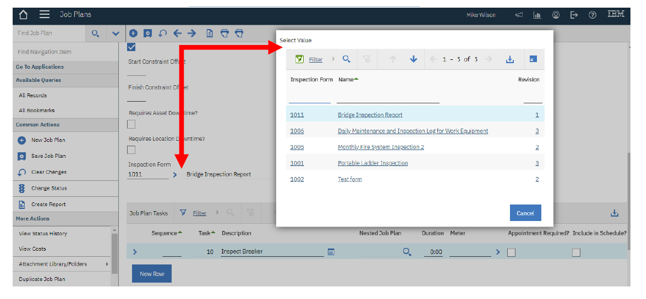
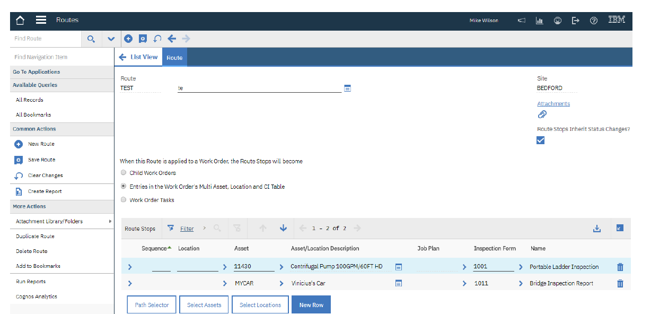
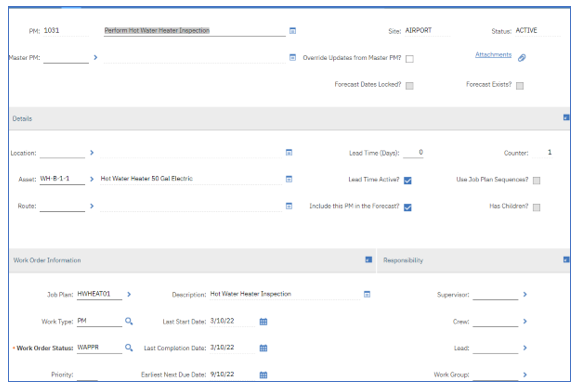
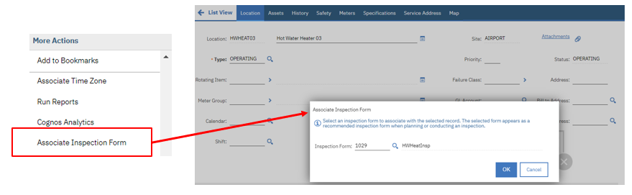
Tip #4 – Associate Inspection Forms to Asset or Locations
When an inspection Form is created, it can be associated with a job plan or job plan task and a route stop so that on a work order, it can appear on the work order header, its tasks, or on a record in the multiple assets and locations table.
Adding Inspection Forms to the route stops
Recurring Inspections would use a PM record with the Inspection Form on the job plan or route.
You can also associate Inspection Forms with locations and assets so that they become a recommended Inspection when planning or conducting an Inspection. Inspection Forms have a type to make it easier to choose the right one.
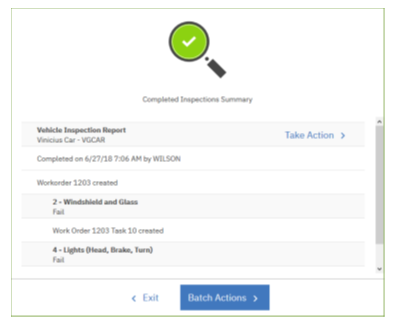
Tip #5 – Use the OOTB automation script to create follow-up WOs
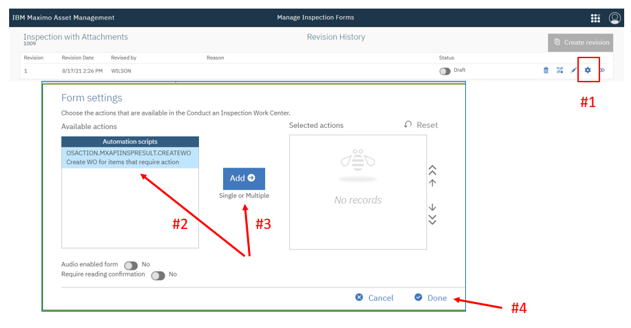
For the inspection, there can be follow-up actions for unsatisfactory results on each question. IBM provides an out-of-the-box (OOTB) autoscript that will gather up all the steps requiring actions and will create follow-up work orders from the Unsat questions.
Click on Form Properties, select the OOTB automation Script, Click on Add, Click on Done to add the follow-up WO creation to your form.
These 5 tips for Inspection Forms should add immediate value to your Inspection capabilities!
Another way to elevate your Inspections process to the next level is by implementing Interloc’s Mobile Informer Inspections application. Mobile Informer makes inspections quick, easy, and seamless for the inspector, and empowers workers by enabling them to perform Inspections regardless of device connectivity. With Mobile Informer's off-line first design, field technicians can execute inspections in places where WIFI and cellular signals fade or are non-existent, such as tunnels and airport runways.
For additional information on the Mobile Informer Inspections application or help with optimizing your Inspections process, contact jmashburn@interlocsolutions.com.